
How To Remove Old Decking
Decks serve as the stage for some of life’s most cherished moments, such as barbecues, birthday parties, evening chats, and precious family time. Even the most durable deck can deteriorate over time when exposed to the weather. As a homeowner or DIY enthusiast, removing old decking may seem daunting, but with the appropriate strategy, it can be a satisfying undertaking that improves your home’s safety and exterior appeal. This detailed guide is intended to help you through the procedure step by step, ensuring that the activity is doable, safe, and environmentally responsible.
The Necessity of Decking Maintenance – Putting a Fresh Face on Your Deck
Maintaining your deck is essential for its longevity and safety. Decks can become worn, damaged, and even structurally unsound over time. Regular maintenance can assist in avoiding these issues and extend the life of your deck.
One of the most important components of deck care is knowing when to replace the decking. Splintering, exposed nails, rotting, loose boards, and substantial damage are all signs that your deck may need to be replaced. Ignoring these signals can result in greater deterioration and serious safety issues.
Before attempting to remove or replace your deck, you must first assess its condition. Taking the time to thoroughly check your deck will provide you with a clear picture of its general condition and assist you in determining the stages required for refurbishment.
Assessment and Preparation
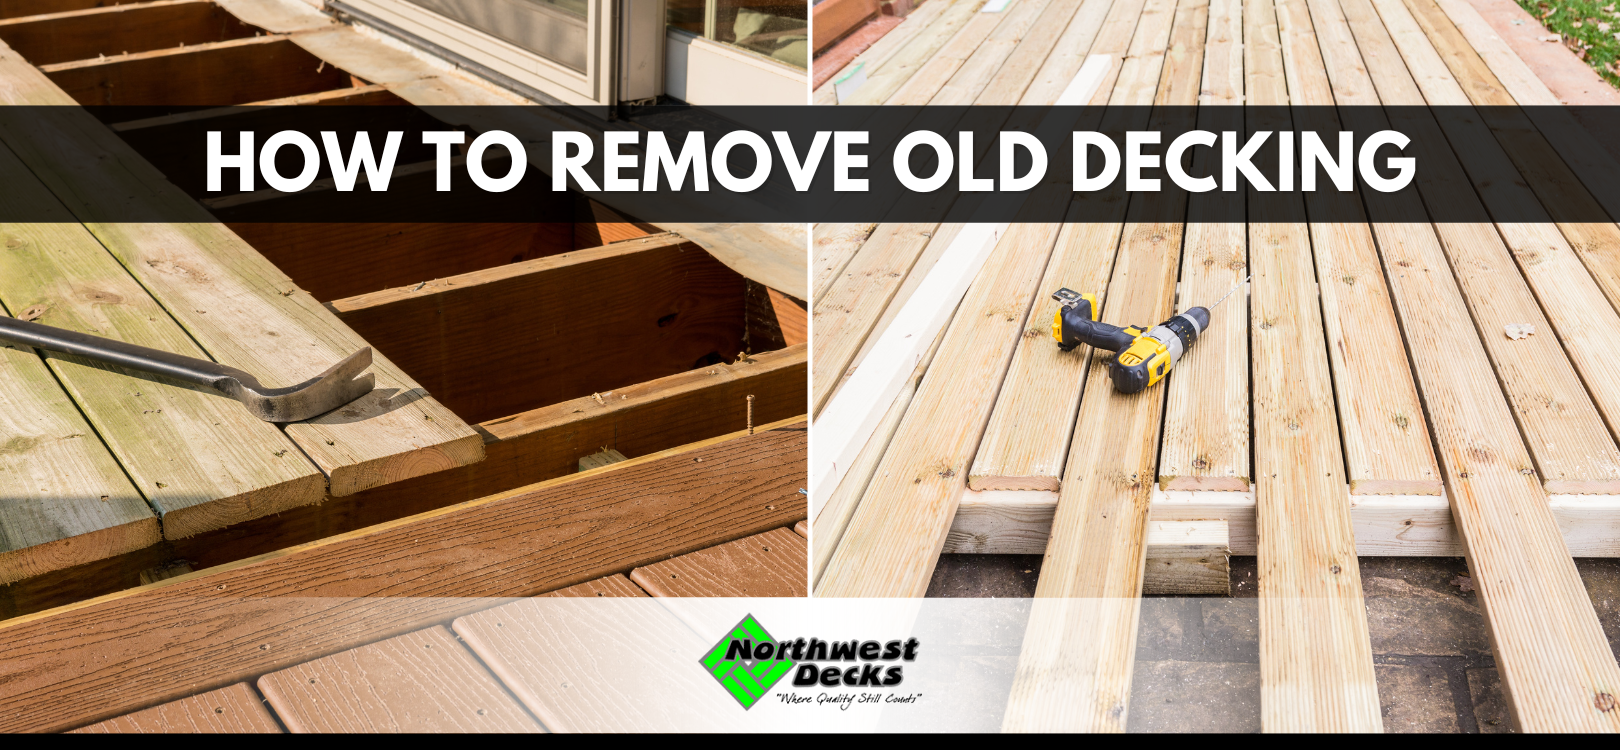
Inspecting Your Deck
Before you swing a hammer, you should thoroughly inspect your deck’s condition. Outdoor decks are prone to weather damage, insect infestation, and disintegration. Start by checking for:
- Rot – Pressing the wood with a flathead screwdriver might reveal weak points.
- Insects – Pests such as termites and beetles, cause extensive damage that may necessitate more than a simple repair.
- Decay – Softness, discoloration, and visible mold are signs of decayed wood.
If any of these conditions exist, full removal is frequently the safest course of action.
Gathering Tools and Materials
Next, gather the tools you’ll need for the project. These may include:
- A crowbar
- A pry bar
- A reciprocating saw for cutting through stubborn screws
- A drill with a proper bit for screw removal
- A stiff-bristled broom
- A wheelbarrow for waste debris
- Protective gear like work gloves and safety goggles
Having these tools at the ready will make the process more efficient and safer.
Step-by-Step Guide to Safely Removing Old Decking
To protect your safety as well as the structure’s integrity, removing old decking involves meticulous planning and execution. Follow these step-by-step procedures to successfully remove your deck:
Step 1. Clear the area: Begin by removing all furniture, plants, and other items from the deck. Clearing the area will give you more space to work while lowering the danger of an accident.
Step 2. Disconnect utilities: If your deck has any electrical or plumbing connections, be sure they are disconnected before beginning the removal procedure. This eliminates any potential dangers and ensures a seamless removal.
Step 3. Remove the railings: Begin by removing the rails, if applicable. Use a pry bar or hammer to loosen any fasteners before carefully removing the railing components.
Step 4. Remove the decking boards: Start removing the decking planks one at a time. Begin at one end of the deck and make your way across. Use a pry bar or hammer to lift the boards and reveal the fasteners. Remove any screws or nails, and save the salvageable boards if you intend to reuse them.
Step 5. Remove the joists: After removing all of the decking boards, you will be left with the underlying joists. Evaluate their condition and determine whether they, too, require replacement. Cut through the joists with a reciprocating saw or circular saw, then remove them.
Step 6. Inspect the support structure: Remove the decking and joists to reveal the support system, which includes the beams and posts. Check for evidence of corrosion, rot, or structural difficulties. Replace any faulty components as necessary.
Step 7. Clean up and dispose: After removing the old decking and joists, thoroughly clean the area. To clean the surface, wipe away any debris with a broom or leaf blower. Dispose of the old decking materials properly, whether by renting a skip or using a rubbish disposal agency.
Safety should always be the top priority when doing such a project. Do not forget to wear appropriate clothing, including long sleeves, long pants, and closed-toe shoes. Use work gloves and safety goggles. Wear sturdy footwear with good traction too.
If you’re unsure about the structural integrity of your deck, it might be wise to have a professional assess it first or help with the removal process.
Proper Disposal of Old Decking Materials
Proper disposal of used decking materials is critical for both environmental and safety reasons. Depending on the materials used in your deck, you have many disposal alternatives to consider:
- Recycling: Old decking boards made of wood can easily be recycled. Check with your local recycling facility to determine if they accept treated wood and if there are any recycling rules.
- Landfill: If recycling is not possible, you may have to dispose of the old decking at a landfill. Contact your local trash management agency to learn about proper deck disposal techniques.
- Repurposing: Salvageable decking boards can be used for a variety of projects, including raised beds and outdoor furniture. Consider donating them to a community garden or using them in your DIY projects.
- Waste removal service: If you have a large amount of decking materials to dispose of or would prefer not to do it yourself, hiring a waste removal service can be a practical solution. They will gather and dispose of the debris correctly.
Remember to check local legislation and standards for disposing of construction debris to ensure you comply with all applicable laws.
Enjoy Your Refreshed Deck for Years to Come
Concluding your deck removal project is just the beginning of the possibilities for your outdoor living space. Whether opting for an entirely new deck or transitioning to a different outdoor area, the attention you give to proper removal will resonate through your home’s safety, value, and impact on the environment.
For those who cannot or do not want to tackle the process themselves, professional deck removal services are available to ensure a safe and efficient removal process. Northwest Decks is a trusted provider of deck installation services, maintenance, and repairs offering eco-friendly options and expert craftsmanship for all your outdoor living needs. If you’re interested in installing a new deck or just need repairs to keep your outdoor space in top condition, we also provide haul-away and disposal services for your old decking.
Contact us today to learn more about our deck services and how we can help transform your outdoor space.